
 Back
Creating a Case From a Workflow
A Case step creates a case in SmartSurvey for the response that triggered the workflow, so responses that need a human reply land in your Cases inbox automatically.
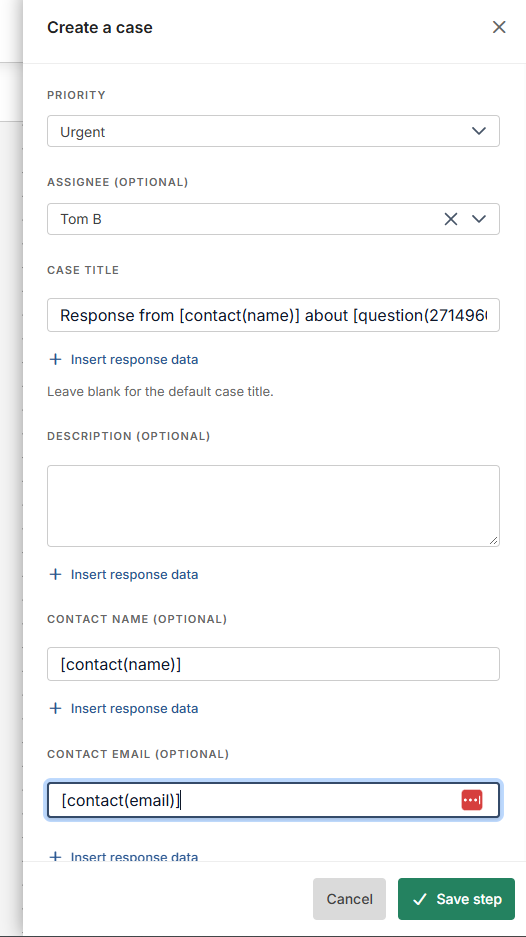
Add a Case step
- Click + where you want the step and choose Case.
- Under Priority, choose the case priority. Under Assignee (optional), choose a team member or leave it unassigned.
- Enter a Case title — you can insert response data such as the respondent's name or a key answer.
- Optionally add a Description, Contact name and Contact email.
- Click Save step.
Priority and case title are required.
Setting the contact details
Leave Contact name and Contact email blank to use the contact from the response's email invitation. If the survey is answered through a web link, fill them in with inserted response data instead, such as an Email Address question. If a contact email can't be worked out for a response, or isn't a valid address, the case is still created with that field blank. See Inserting Response Data into Workflow Actions.
How the case is created
The case takes the first open status in your account plus the priority and assignee you chose, and the run history links straight to it. Cases created by workflows count towards your plan's case limit; if the limit is used up, or the chosen priority or assignee has since been removed from your account, the run stops and appears on the Issues page with the reason. See Monitoring Workflow Runs and Fixing Issues.