
 Back
Creating a Workflow
A workflow is built on a canvas: choose the survey it listens to, add the steps you want to happen, then publish it to turn it on. This guide covers creating a workflow and setting up its trigger.
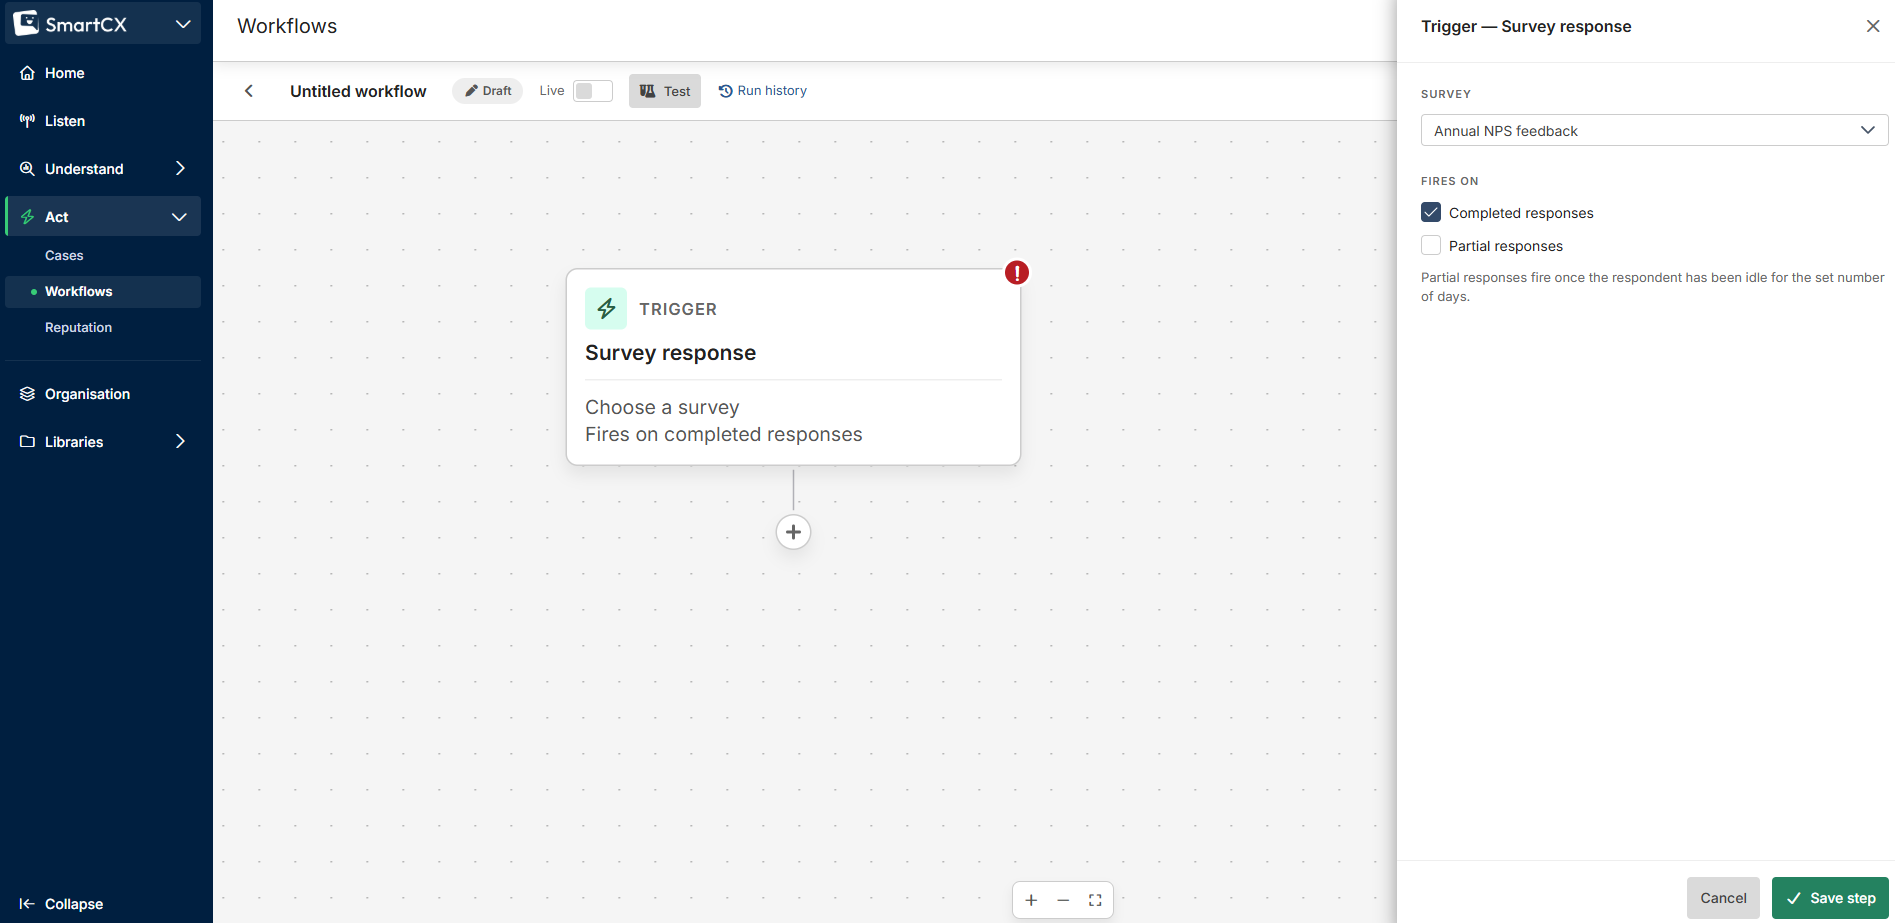
Create the workflow
- Click Workflows in the main navigation, then New workflow. A draft called Untitled workflow opens on the canvas.
- Click the name at the top of the page to rename it, then press Enter. Choose a name that explains what the workflow does, as colleagues see it on the All workflows page.
Set up the trigger
The Trigger panel opens automatically for a new workflow. To change it later, click the trigger card at the top of the canvas.
- Under Survey, choose the survey the workflow listens to. You can type to search.
- Under Fires on, tick Completed responses, Partial responses or both. For partial responses, set the number of idle days — the response fires once the respondent hasn't touched it for that long (minimum 1 day).
- Click Save step.
The trigger survey decides which questions you can use in conditions and which response data you can insert into emails and cases, so choose it before adding other steps. Each response enters a workflow once per event — a completed response can't start the same workflow twice, so a response processed more than once behind the scenes won't produce duplicate emails or cases.
Note — Once the workflow has been published, the trigger survey is locked. For a different survey, create a new workflow.
The Exit rules section offers Leave the workflow when the respondent submits a response to this survey and Auto-exit after a set number of days.
Add steps
- Click the + button beneath the trigger, or beneath any step, where you want the new step to go.
- In the Add a step window choose Conditions, Branch, Wait, Email, Follow-up or Case. A greyed-out card with a Not available badge explains on hover why it can't go there.
- Fill in the step's panel and click Save step.
Click a step card to reopen its panel. To remove a step, use the three-dot menu on the card and choose Delete step, or select the card and press Delete. For each step type, see Adding Conditions, Branches and Waits to a Workflow, Sending an Email Notification from a Workflow, Sending a Follow-Up Survey from a Workflow and Creating a Case from a Workflow.
Saving and fixing issues
The canvas saves automatically a moment after each change — you'll see Saving… in the header. Closing a panel with unsaved edits asks you to Discard changes or Keep editing. Saving is not publishing: nothing acts on real responses until you publish.
A step that isn't fully configured shows a badge on its card; hover over it to see what's missing. You can't publish until every error is fixed. Use the Zoom in, Zoom out and Fit view controls, or drag the canvas, to move around a large workflow.
When the workflow is ready, see Testing and Publishing a Workflow.